How To Change The Spark Plugs In Your 1993-1995 3.4L V6 Firebird or Camaro.
Estimated
completion time:
4 hours if inexperienced.
Tools
and materials:
-Socket Set, with 2 3" extensions. (Required, 3 3" extensions would be ideal)
-Spark Plug Socket 5/8" (Required, a spark plug socket has a rubber grommet
to protect plug)
-Plugs and Wires (Required)
-Spark Plug Gap Setting Tool (Resuired, available at AutoZone for 99cents,
just ask)
-Anti-seize Compound, and Boot Protector (Strongly recommended, available
at AutoZone for 99cents, just ask)
-Torque Wrench (strongly recommended)
-Air compressor, Air pump, Shop-Vac, or Vacuum cleaner (Strongly recommended)
-Chalk or Pencil and Paper (recommended)
Steps:
1. Before you do anything, disconnect the negative battery cable. *Don't
disconnect the battery yet, if you have the factory stereo. It should have
a theft lock future on it. If the Theft-lock LED is on, you need to either
disable it, or make sure you have the code before you disconnect the battery.
Other wise, it is safe to disconnect the battery. (If your theft lock LED
is on and you don't know what to do, contact your GM dealer before you start)
2. Set all the gaps on your spark plugs to .045 inches using the gap setting
tool.
3. You want to do one plug and one wire at a time. Don't take all the wires
off at once because each plug is mated with a particular size wire.
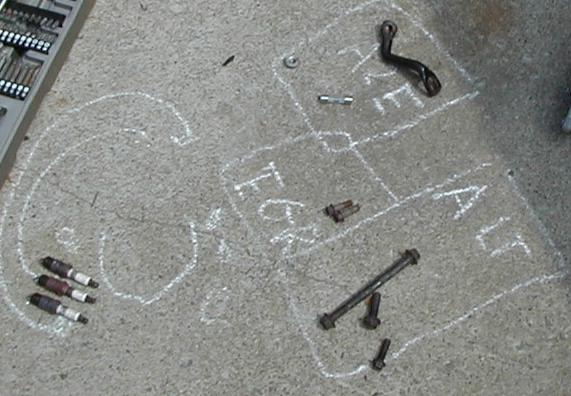
4. As you remove plugs and/or nuts and bolts, place them in chalk outlines
or on a labeled piece of paper to indicate where they came from (See Picture).
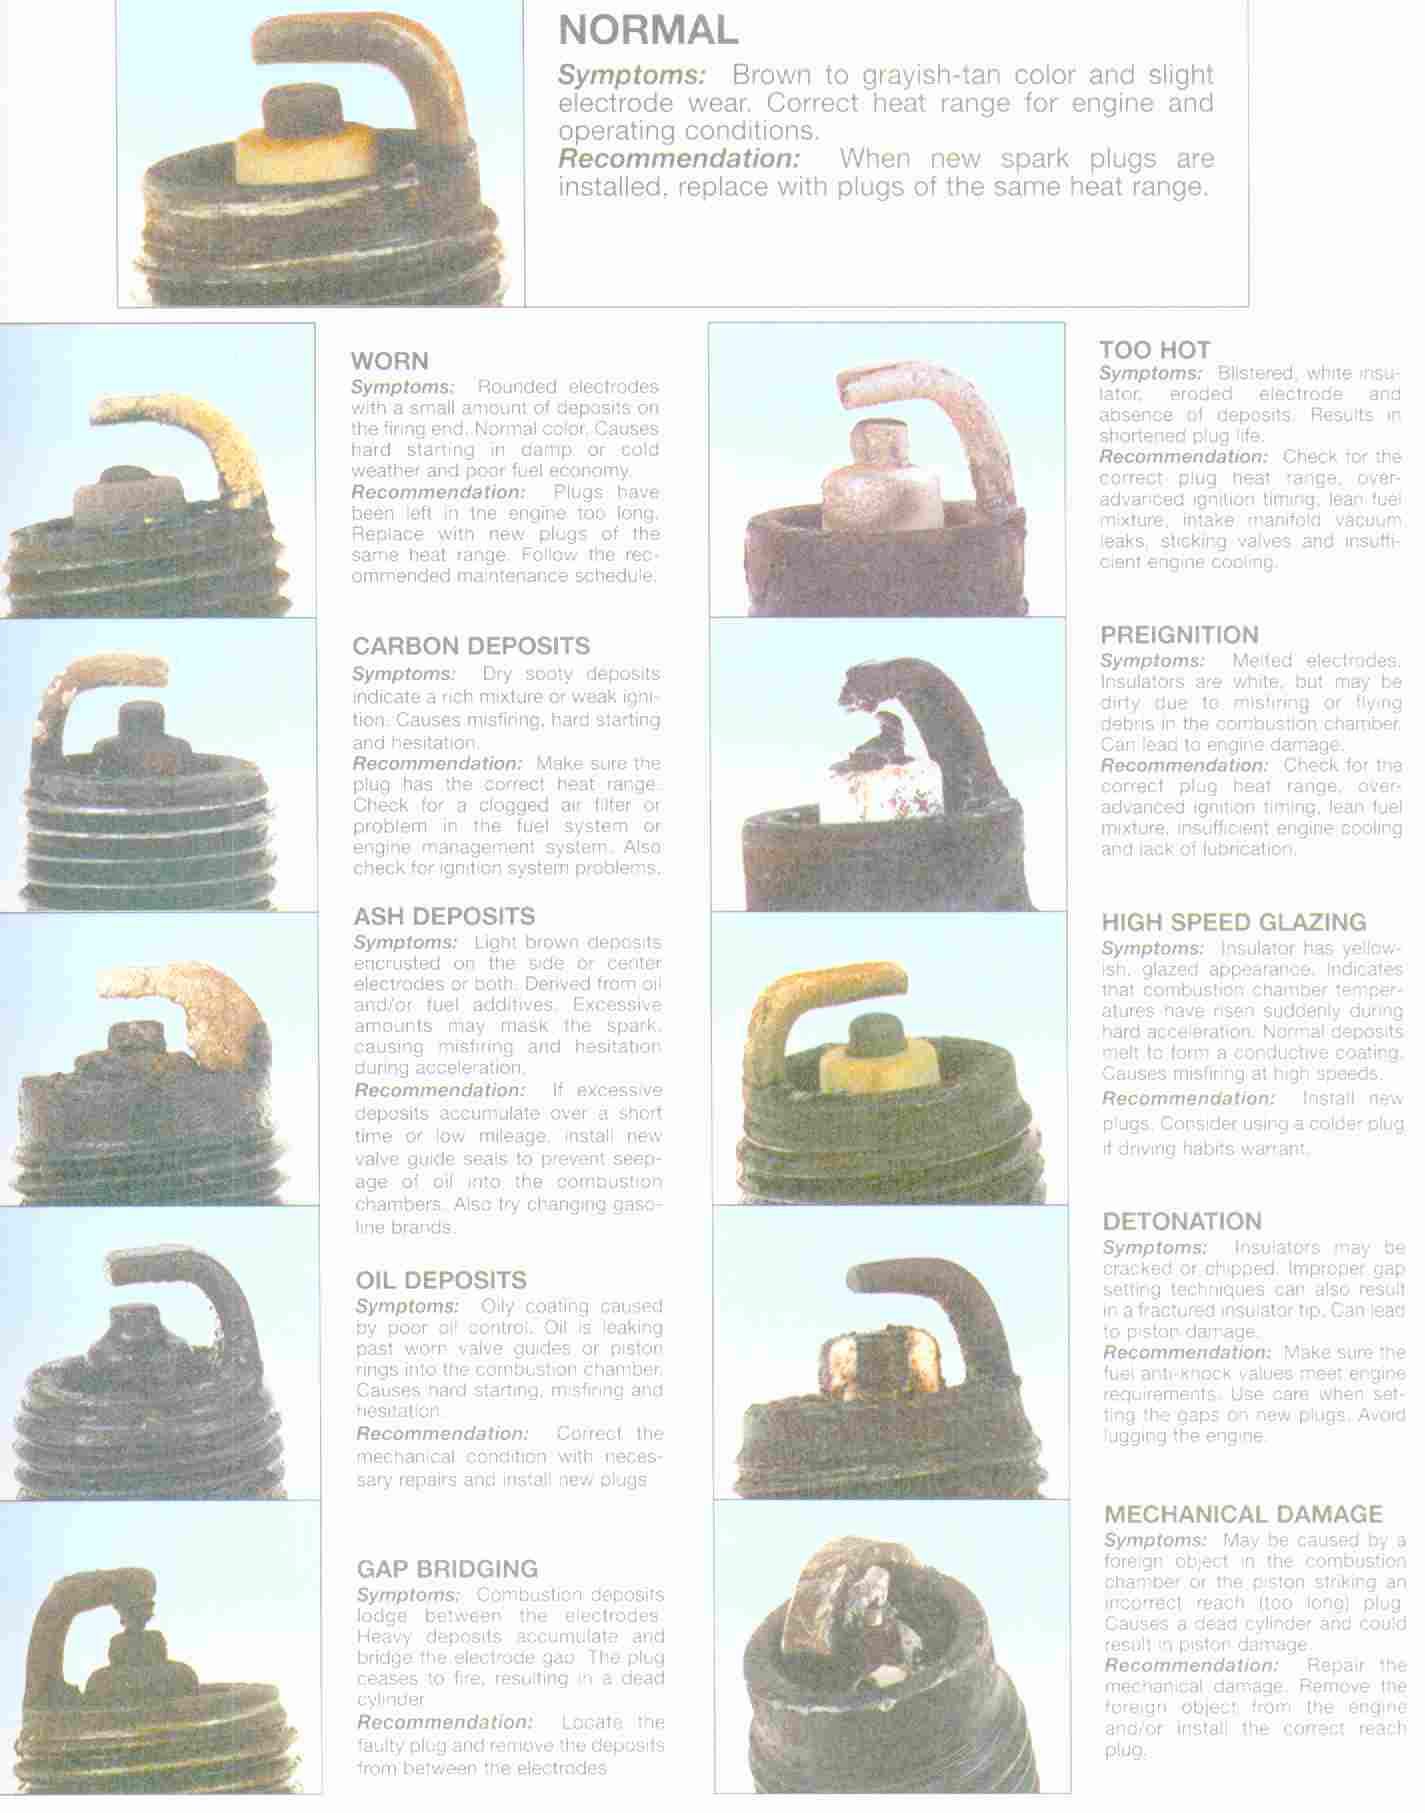
The appearance of the
old plugs can indicate problems with various parts of your car (See this
link).
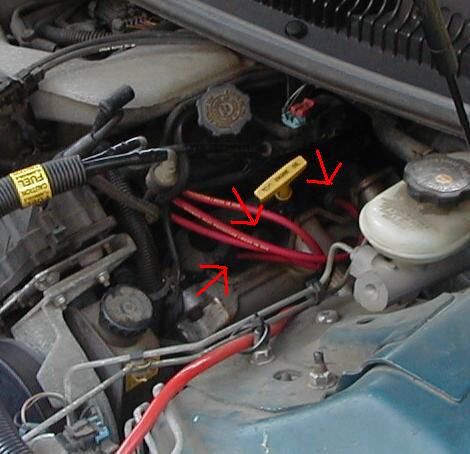
5. Start with the plugs on the right hand side of the engine. These are
easy to access and change. See the "Changing an Individual Plug" section
for steps to change each plug. (See picture for location)
6. Next,
change the plugs on the left side.
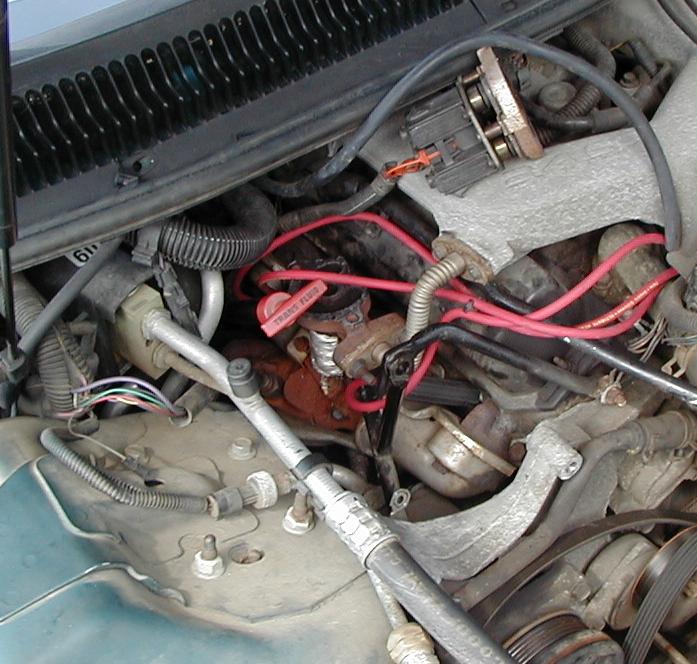
7. For easy access to the plugs, it is best if you remove the alternator
and EGR valve (See picture). As you remove nuts and bolts, place them in
chalk outlines or on a labeled piece of paper to indicate where they came
from (See Picture).
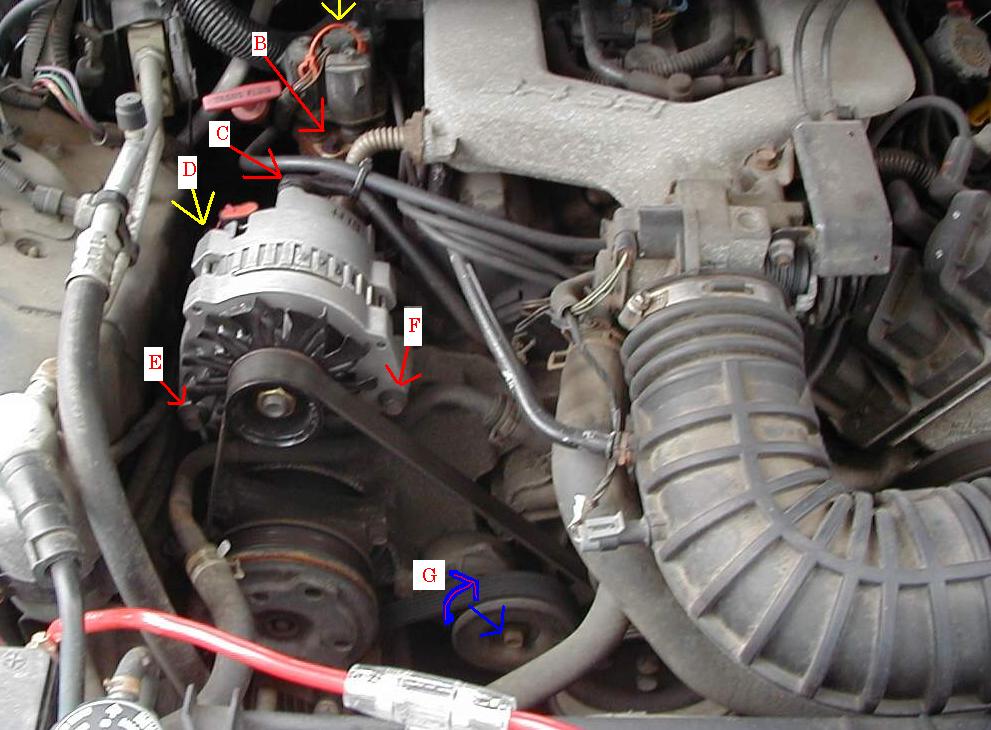
8. First remove the Serpentine belt from the alternator, by using a long
handled wrench on nut "G" and turning clock wise to remove tension.
9. To remove alternator, remove the connector next to nut "D", Remove nuts
"C" and "D" and remove bolts "E" and "F" (note: there is a nut on the back
side or bolt "E" that needs to be retained). Next remove the power wire
from he back of the alternator. Remove alternator.
10. Remove EGR valve by removing bolts "A" and "B".
11.Vacume around EGR valve and set valve on top of the engine. (See below)
12.
Start with the one closest to you and work your way back. See the "Changing
an Individual Plug" section for steps to change each plug.
13. Install EGR valve and Alternator, and you are done.
14. Wile you have your belt off, it would be a good idea to replace it if
it looks old, dry or cracked.
Changing
an Individual Plug:
1. Grab the existing wire (by the boot, not the wire) and pull it from the
existing plug. If it will not come loose, try turning the boot to loosen
it from the plug. If still nothing, try slitting the boot with a razor blade
so the boot can be slid off easily. (don't put the existing wires back on,
buy new wires)
2. Use the air compressor to remove any particles from around the plug,
so that junk does not get into the cylinder. If compressed air is not available
use a vacuum cleaner or a shop-vac set on blow.
3. Remove the existing plug.
4. Apply Anti-seize compound to the threads of a new plug, and apply boot
protector to the other end.
5. Insert plug into Plug Socket and hand tighten into place (DO NOT CROSS-THREAD)
.
6. Tighten to 25 foot/pounds using a Torque Wrench. If torque wrench is
not available, grasp the wrench 1 foot from point of rotation and tighten
with the same force it would require to lift a 25-pound weight.
7. Remove the existing wire, and match with a new wire of the same length.
8. Apply boot protector to inside of boot, and place over spark plug. The
boot should snap into place.
9. Run the new wire in the same course that the old one was run.
10. Connect new wire to the same spot on the distributor that the old one
was connected to. The wire should snap onto the distributor turmianl.(It
is a good idea to clean the terminal on the distributor with rubbing alcohol
and apply boot protector before connecting the new wire)
If you have any problems with this page or have any questions regarding it's contents, please contact me at JasonRiesbeck@stny.rr.com